Wednesday, July 13, 2011

Kegerator Build

If the laws of nature allowed it, I would ideally like to have a river of beer flow through my yard, in which all I would do is grab a mug from the house and grab a nice refreshing beer whenever I want.  But I can't (yet anyways), BUT I can have the next best thing, a kegerator!  Every time we bottle beer it takes about an hour to sanitize 50+ bottles, and fill and cap them with beer (with 2 people).  I'm not going to lie, I made that sound a lot smoother than bottling day actually goes for us.  Usually we have a major disaster like the capper bending or the valve from the filler getting clogged with small hop particles, but what if this could all be avoided?  And it can, thanks to building my own kegerator.  I've seen kegerators on the market that sell for $500+ but that was a bit out of my price range, and the website that I gain a lot of valuable information from homebrewtalk.com has a Do-It-Yourself section, from which I got the idea.

So to start off, I did what any sane poor person would do and searched craigslist for a refrigerator.  Turned out to be a little more difficult than logging in and magically finding a cheap fridge, but after about a months worth of searching my dad said he found a $25 fridge near my house, in which he so kindly helped me pick it up with his truck... thanks dad!  This fridge was more disgusting than any Miller beer... seriously, look at the picture... I think that's rotten meat juice, which is exactly how it smelled.  Needless to say, I did some heavy duty cleaning.

Before :(
After :)
Not only did my dad help with picking it up, but also with the massive holes that needed to be drilled.  Apparently, it's pretty freakin' hard to drill a 1" hole in a fridge.

Next step, feed the shanks and faucets through the holes, run some lines to a keg, and viola! Kegerator!

I wish that really that fast, but in actuality I had to wait a week or two before my Thanks-A-Latte Coffee Stout was finished fermenting.  And now it's on tap!  My cousin also got me a sweet chalkboard tap handle for Christmas last year which I've put to good use, as you can see from the pictures.

Lastly, I needed to find a place that would fill my 5 lb CO2 tank, and luckily I found a place near my job that fills it for $8.  The guy was pretty nice and filled it up in less than 5 minutes.  I think one full tank will get me through 5-7 kegs worth of beer, but I guess I'll found out exact values later on down the road.

A tap is much more convenient for whenever I have guests over because now I can put those small beer tasting glasses to good use that my roommate and I have accumulated from all the beer festivals we've gone to.  Can't wait until I've got a second beer on tap!  My roommate and I have a crazy brew coming up, I wouldn't want to spoil anything in advance, but it is going to be the next on tap.  Do I see a possible tasting party in the near future?

Enjoy the pictures!  If you're wondering what the mason jars in the fridge are, they are yeast that I've saved from a previous batch of beer in which I can reuse in future batches.

Note to self:  Draw my future river of beer.

Tuesday, March 8, 2011

Thanks A Latte Coffee Stout

The name of this beer stems from an event that happened a few years ago.  After church on Sundays my family would always head over to the St. Louis Bread Company (aka Panara) for a nice breakfast and coffee.  Everytime I would just get a bagel and hot coffee, but my cousins and younger brothers started to try some of the many many possible ways to make coffee... well, not taste like coffee.  Fraps, lattes, capichinos, you name it, they went crazy for these quite delicious beverages.  Normally when ordering one the order would be placed and you went and stood off to the right and watched someone make your drink.  As you can imagine, my youngest brother Zach thought of a clever play on words for that sorry soul making the drinks.  At the time he probably thought it was the single most greatest line ever, and the stupid grin on his face showed it.

Drink maker: "Frozen latte!"
Zach: "Thanks A Latte"

And thus, the "Thanks A Latte Coffee Stout" has its name.

I didn't necessarily rush out to brew this beer for the purpose of naming it that, I am quite the avid coffee drinker and had the strong urge to combine two of my favorite beverages in the world, beer and coffee.  During the winter months I love to grab a 6 pack of Coffee Stout from a local brewery here in St. Louis, Schlafly.  So I set out to try to devise a recipe of my own, which happens to be the very 1st Holtbrew recipe!  Here you go:

Thanks A Latte Coffee Stout (Holtbrew recipe)
Grains/Ingredients

8 lbs                       Rahr 2-row pale                                         
1.25 lb                   Roasted Barley                                             
0.75 lbs                 Crystal Malt 60L                                          
0.5 lbs                   Chocolate Malt                                              
0.25 lbs                 Oatmeal                                                            

4 oz. Lactose added at beginning of boil                                            
12 oz. Coffee Beans (Cafe Kaldi) – Steeped for 16 hours in 5 cups of boiled/cooled water and added during kegging

Hops

1 oz. East Kent Goldings (60min)                                                               4.5% AA

Yeast

Wyeast 1084 Irish Ale (Optimum Temp: 62-72F) – 1 quart yeast starter

BrewDay Stats                                  

Style: Sweet Stout

Brewed:  1/23/11

H2O/grain ratio:  1.15 qt/lb  (Added 1 tsp of gypsum)
Mash Temp (Time):  158-153.5F (60min)
Mash Out Temp:  158F
1st Batch Volume/SG:  3.0 gal/ n/a
Grain Absorption (gal/lb):  0.13

2nd Batch Sparge H2O Temp/Mash Temp:  190F/168F  (Added 0.5 tsp of gypsum)
2nd Batch Volume/SG:  3.125 gal/ n/a

Pre-boil Volume: 6.13 gal
Pre-boil SG:  1.050
Boil Time:  60min
Post Volume Boil: 5.0 gal
Mash Efficiency:  83%

Transferred to secondary:  1/31/11
Kegged:  2/20/11

OG = 1.062
IBU = 15
BU:GU = 0.24
Fermentation Temp:  64F
FG = 1.022
Apparent Attenuation = 65%

ABW(%) =  4.1%
ABV(%) =  5.2%


I picked a "sweet stout" as the style because I wanted to have a medium to full-bodied beer, meaning I'd have to have a significant amount of sugar that could not be consumed by the yeast (unfermentable sugars).  There were two ways we went about doing this:
1) We held the mash (crushed grains + heated water) at a relatively hotter temperature (158F) than we normally do (154F).  There are 2 types of enzymes that break down starches into sugars, alpha amylase and beta amylase.  If you think of starches as just long chains of sugars, beta amylase nibbles the sugars off of the ends of the chains resulting in more fermentable sugars, and alpha amylase chops the chains in half resulting in less fermentable sugars (more unfermentable ones).  The reason why we normally hold the mash at around 154-155F is because that's the temperature range where both enzymes are active, if we go colder, alpha amylase becomes inactive, and if we go hotter beta amylase becomes inactive, which is what we chose to do to get more unfermentable sugars.
2) I used a lactose addition.  Lactose is milk sugar and it cannot be fermented by brewers yeast, but I also figured it should be a nice addition simply because "latte" is in the name.

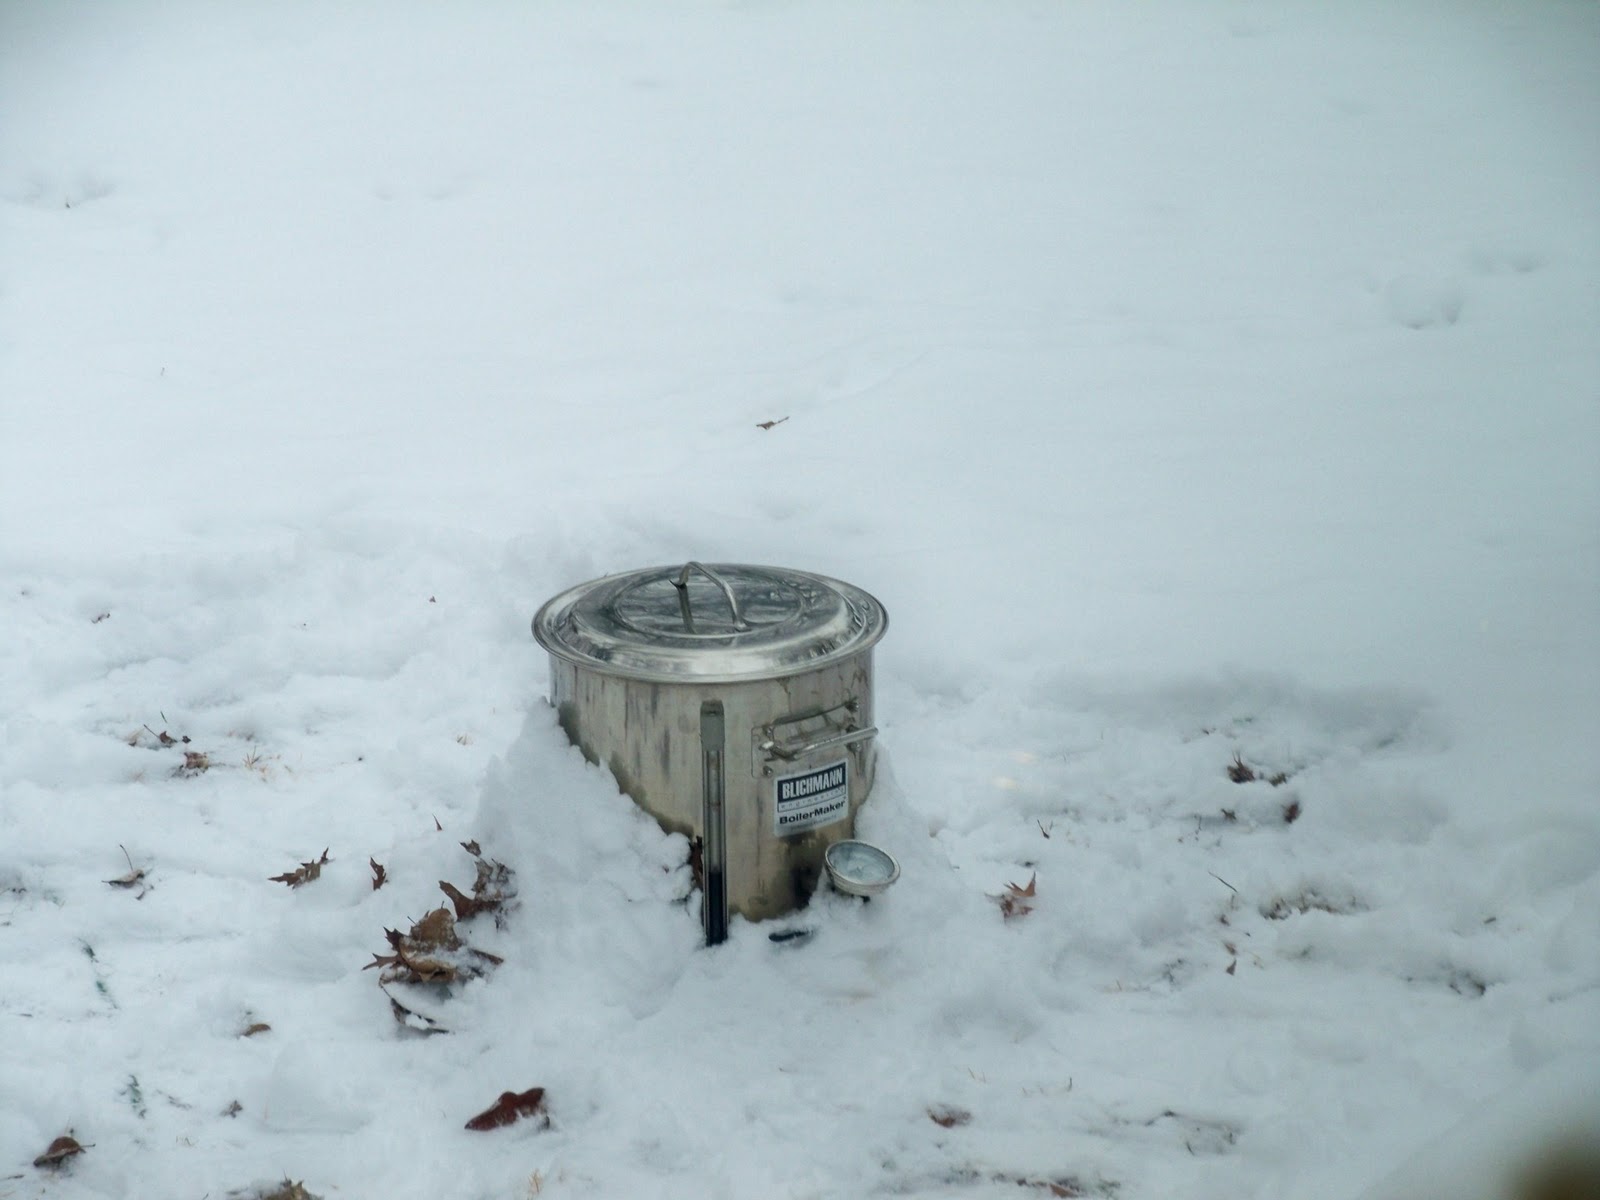
As good as brewdays can go, I'd say this was probably one of our best ones.  The only problem we had was cooling the wort and it somehow worked to our advantage in some way.  We had just gotten over a couple snow storms in St. Louis and temperatures were not particularly what we'd call "warm".  I believe the brewday temperature was hovering in the mid 20F range, and that's not including the wind chill.  The problem was that the hose, which we use for running water through our wort chiller, was frozen rock solid, so we had to be a little creative (as you can see from this picture):


Just packing snow around it didn't help much when reducing the temperature, but when we stirred the wort with a sanitized wand it dropped rapidly.  Overall, it probably took us an hour to cool the wort from boiling to 80F, and that was with taking warm up breaks.  The reason I said this worked to our advantage was because while we were stirring we were oxygenating the wort really REALLY well, which is excellent for the yeast.  The more oxygen that is absorbed by the wort, the faster the yeast can use their reserved food and start munching on the sugars in the wort, resulting in faster fermentation.  Normally it takes between 6-12 hours for the airlock to show any kinds of bubbling activity, but this coffee stout was bubbling in less than 4 hours!

The coffee addition was interesting.  I did some research on a great homebrewing website (HBT) on how other people have added coffee to their brews.  I finally settled on what is called "cold brewing" coffee, which is essentially brewing your coffee without hot water.  The process can probably be explained better elsewhere but I'll give you a brief summary of what I did.  I boiled and cooled about 5 cups of water in a pitcher and ground up the 12oz of coffee with a sanitized grinder set on med course.  Then I threw the grounds into a sanitized muslin bag to be steeped in the 5 cups of water for 16 hours.  During kegging I removed the muslin bag and poured the super concentrated coffee in with the transferred beer.  Note: I probably ended up with 2-3 cups of the final cold brewed coffee, the ground beans soak up A LOT of liquid.

As a side note and not really related to the beer in anyway, but this was my first beer that I was going to keg.  That's right, all those hours spent transferring the beer into 50+ sanitized bottles are now reduced to one single transfer of 5 gallons... I've never been happier.  Plus, I've now got this sweet refrigerator in my basement that was converted to a kegerator.  Thanks to my dad for helping me pick up and haul the fridge there and also with the drilling.  I'll try and write a post about building that soon.

After pulling the tap handle about a week into carbonating at 8 psi, the beer was relatively flat with some carbonation.  I decided to let it sit for another week or so, in which it became much more carbonated than before, but I'm considering letting it carbonate for another couple days.  From the time of tasting after 2 weeks there's a couple things I noticed.  This has an intense coffee aroma... like, ridiculously noticeable.  If I were to do this coffee stout again I'd consider stepping down to 8oz of coffee instead of 12oz.  I have read on forums about coffee flavor and aroma in beer and people have reported that if given enough time, the coffee effects will be reduced, I guess I'll have to wait and see with mine.  I like the taste, it's such a full-bodied beer, which is what I was going for, and one pint of this would probably equate to an entire meal for some people.  I'm not sure if it's the roasted barley or the coffee addition, but you can definitely taste a strong roasted flavor in the beer, which I find enjoyable.  Overall, I'm pleased with the outcome, and I'm even more excited to see how this beer ages over time.  Perhaps I will consider making a coffee stout ice cream float?... ... make that a definite yes.

Saturday, February 12, 2011

Sugar Extraction and Predicting OG

When you make beer, there's two main ways that you can go about doing it, one method is making it from extract and the other is via the all grain (AG) method.  When you first start brewing it's typical to go out and buy extract, it really speeds up the brewday.  When I talk about extract I refer to the sugars that go into our beer compressed into either a powder or syrup:


You can buy these by the pound from your Local Homebrew Shop or online.  It is a little more pricey but you're paying for a shorter brewday because you can just start the brewday by boiling the water.  On the other side we have the all grain method.  The AG method involves an extra step called the "mash", which can take more than an hour to complete in most cases.  It is basically steeping the crushed grains in hot water for an hour in order to extract the sugars from them.  And remember from the Determining Percent Alcohol post, the more sugars we can get from the grains, the higher the Original Gravity will be.  But I'm going to tell you a little secret *drum roll*... I've already predicted how much sugar will be extracted before I even steep the grains.  I mean, what kind of scientist would I be if I couldn't predict the future with math?... not a very good one.

The mash, as I said before, is steeping the crushed grains for an hour in hot water.  How hot?  About 150-158 degrees F.  Why?  That's the temperature range the enzymes in the grains are active.  These enzymes breakdown the starches from the grains into simple sugars that we can ferment into alcohol, so in summary, these enzymes are pretty freakin' important if you want to make beer.  It goes something like this:


The way we predict how much sugar will end up in the wort is through a term I like to keep track of called Mash Efficiency.  Mash Efficiency is recorded as the percentage of sugar extracted from the grain.  Each type of grain has it's own Grain Potential (reported as 1.0xx), which is what you would read on the hydrometer if you were to mash 1 lb of that certain grain and drain out 1 gallon of water with 100% extraction of the sugars.  This number may look very similar and in fact the xx actually are what we call "points", or another term, Gravity Units (GUs) from the BU/GU ratio post.  We refer to these as points sometimes because a term commonly used by brewers is ppg, or points per pound per gallon, which is what I described earlier about the 1 pound and 1 gallon extraction.  The terms are interchangeable, I could say "2-row has a Grain Potential of 1.036" or "2-row provides 36ppg", they mean the same thing.  For calculations we'll use the ppg value (or GUs, if you're more comfortable with that terminology).

Let's work through a real life example.  For the next brew that we have coming up, it's a relatively simple pale ale, containing only 2 types of grains. Here's the grain bill:

7.5 lbs 2-row (Grain Potential = 1.036)
0.5 lbs 60L Crystal Malt  (Grain Potential = 1.034)

Total = 8.0 lbs

The plan is to mash this 8 lbs of crushed grain with about 155F water for one hour.  How much water?  Up to you, it sometimes depends on the style of beer, but for the most part I've seen people use from 1.00qt/lb to 1.75qt/lb.  We usually go with 1.15 quarts of water per pound of grain, which works out to be 9.2 quarts or 2.3 gallons in this case.

Moving on... how much sugar will we get from this?  Well, I'm glad you asked.  Since we plan to make 5 gallons from this recipe, we'll probably need 6 gallons of wort generated from the mash, this will be called our pre-boil volume (it is typical for 1 gallon to be boiled off over the course of 60 min).  The pre-boil volume is whatever volume we get from the mash, so that will be our "per gallon" value in ppg, in this case 6 gallons.  Next we need to calculate how much sugar can be extracted if we extract 100% of the sugars from the grain.  Since the 2 grains we're using have different Grain Potentials we can calculate them separately, then sum them in the end:

2-row:                 7.5 lbs x 36 = 270 GUs
Crystal Malt:       0.5 lbs x 34 = 17 GUs

270 + 17 = 287 total GUs

So we can get a total of 287 GUs from all 8 lbs of grain.  Now we divide by the pre-boil volume:

287 GUs ÷ 6.0 = 48 GUs

What this tells us is that after the mash is over, and we're left with 6 gallons of wort, if we extracted 100% of the sugars our hydrometer should read 1.048.  But as I said earlier, that's not very likely to extract all 100%, so now we can multiply it by the Mash Efficiency.  In our setup, the mash efficiency is close to 80%, meaning we extract 80% of the sugars from the grains everytime we mash:

48 GUs x 0.80 = 38 GUs

Or in a real situation we would actually expect the hydrometer to read 1.038 because we would have extracted 80% of those sugars.  Doing one last basic step, we'll use the equation for dilution to find our final concentration of our wort after our boil from 6 gallons to 5 gallons (where Mx is concentration and Vx is volume):

M1V1 = M2V2
M2 = M1V1 ÷ V2
M2 = (38 GUs)(6gal) ÷ (5gal) = 46 GUs

So our final concentration of our wort (or the Original Gravity) is predicted to be 1.046.  How about that?  And we haven't even brewed yet!  A lot of times you'll here experienced brewers say "Oh, I was only 2 points off from my Target OG".  This OG calculation that I've just gone through is what they're referring to as the Target OG.

Mash Efficiency can vary from brewer to brewer and no one can tell you your mash efficiency for you.  You just have to brew and find out.  The only numbers you need to measure on brewday are the hydrometer reading just before you boil the wort and the exact pre-boil volume.  Along with the grain potentials that are available online, you can calculate your own mash efficiency for the next time you brew.  For our example, let's say that we mashed the grains mentioned above and got 6 gallons drained out and our pre-boil hydrometer reading was 1.036:

(Our hydrometer reading in GUs) ÷ (hydrometer reading for 100% of sugars extracted in GUs) = 36 ÷ 48 = 0.75 = 75%

If that was our hydrometer reading then we would have a mash efficiency of 75%.  If you're just starting to do all-grain brewing they say assume 75% mash efficiency when brewing for the first time, then you can calculate your actual mash efficiency from that.

Lots of factors affect the mash efficiency, such as crushing the grain (too fine or not crushed enough), water temperature, dead space where water gets trapped in your mash tun, etc.  So you really just have to experiment and find a balance that works for you.

Tuesday, February 1, 2011

X-Patriot

Starting off 2011 right, er... technically this was the last day of 2010.  That, and this wasn't our finest day of brewing either.  It was plagued with error, so maybe we didn't start 2011 off right.  Fellow homebrewer Scott developed a recipe for a pretty awesome American IPA, which he calls the "X-Patriot".

Two days before brew day I went to go make a yeast starter with the new 2000mL Erlenmeyer flask we got from Northern Brewer, and I was all excited about using it because I could heat the starter solution over my gas stove and cool the solution in the same container.  That way I could just pitch the yeast into the flask and avoid the step of transferring the solution.  Sounds like a plan, except for while sanitizing the flask I dinged it lightly on a measuring cup, causing the flask to crack ALL the way around, like a rock hitting a car windshield.  There goes my hopes and dreams.  Luckily, I had a gallon jug on hand, so I just used that as the stirring vessel.  Next problem was that the stir plate we're using for the first time gets WAY too hot, which is enough to heat the yeast to an uncomfortable temperature.  Typically you want the brewers yeast to be warm during a yeast starter, but not in the 100's degree F.  Problem was solved by constantly shutting off the stir plate or taking the yeast off the plate, either way the yeast didn't get to multiply as much as I would have liked.  And the funny thing is, we haven't even started brewing yet!

Last day of 2010 was quite a warm one here in St. Louis, I couldn't have asked for a better brew day, although thinking back on the day, there was a freak thunder storm/ tornadoes that leveled many houses a few miles west of us... yeah, forgot that part.  It rained hard for like 2 or 3 minutes near us, then it was sunny and 50F the rest of the day!

Starting off the day, when we threw in our heated strike water over the crushed grains we didn't reach the temperature we wanted.  We panicked and quickly boiled a quart of water to toss in but it only made the grain bed a degree or 2 higher.  We just cut our losses and settled at around 152F for the mash temperature.  Despite the warmer weather, we lost a lot of heat from our mash tun over the course of an hour, a lot more than usual.  Thinking back on this, I believe it was because the lid to the mash tun was slightly open because the cord for the thermometer was so thick.  Anyway, most of this didn't matter in the long run because we still extracted tons of sugars from the grains... crisis averted.  Now let's move on to the next disaster... apparently when I went to clean the ball valve of the boil pot, I forgot to add the washer back on when reassembling the apparatus.  This caused leaking in that area when we poured the wort into the boil pot... *sigh* so we cleverly poured the wort back into a bucket and wedged the O-ring back to a position to where it wasn't leaking.  But that wasn't all, oh no, the forces of the universe wouldn't let us get away that easy.  After boiling and cooling the wort, we went to drain it, AND.... nothing.  Not even a drop with the ball valve completely open!  It must have just been clogged with hops, so we did what we did best and tried (emphasis on the word "tired") to pour the wort through strainers and into the bucket by lifting and tilting the 10 gallon boil pot with 5 gallons of wort in it.  You can just imagine how much of a fail that was, we probably lost about 3/4 of a gallon useing this brilliant method... oh well.  Alright, enough complaining, here's the recipe:


X-Patriot American IPA
Grains

9.0 lbs                   Rahr 2-row pale                                          
1.5 lb                     German Munich Malt                                  
0.5 lbs                   Briess Caramel Malt 60L                                 

Hops

1 oz. Columbus (FWH)                                   14.4% AA
1 oz. Columbus (60min)                                  14.4% AA
2 oz. Simcoe (0min)                                         12.2% AA

2 oz. Cascade (dry hopped 10 days)            6.1% AA

Yeast

WLP060 American Ale Yeast Blend (Optimum Temp: 68-72F) - 1 quart yeast starter, 1 cup DME

BrewDay Stats 

Style:  American IPA

Brewed:  12/31/10

H2O/grain ratio:  1.24 qt/lb
Mash Temp (Time):  152.6F-147F (60min)
Mash Out Temp:  154F

Pre-boil Volume: 6.25 gal
Pre-boil SG:  1.052
Boil Time:  60min
Post Volume Boil: 5.0 gal
Mash Efficiency:  82%

Transferred to secondary:  1/8/11
Bottled:  1/29/11

OG = 1.064
IBU = 98.4
BU:GU = 1.54
Fermentation Temp:  64F-72F
FG = 1.010
Apparent Attenuation = 84%

ABW(%) =  5.6%
ABV(%) =  7.1%

I'm pretty excited to try this beer, we just bottled it last weekend so I'll have to update this post when we do get around to trying it.  Just smelling the aroma from dry hopping with the Cascade hops is enough to make me excited, hopefully this beer tastes as good as it smells.  Here's a couple of pictures:

We've got Scotty stirring the hops back into the boil on the left, and a picture of the beer dry hopped on the right.  You can kind of make out the wrap of the carboy heater, it's on pretty loosely but it keeps the beer at a nice mid 70F range, and considering the room I keep it in can get down to 60F, it's pretty helpful

Thanks to our friend Anne, who seems to have become our brew day photographer, which I'm really grateful for since Scott and I are either too busy or forgetful.  So if you do see any pictures of our brew day adventures, it's most likely from her.


Wednesday, January 26, 2011

Determining Percent Alcohol

Whenever I've talked to people about homebrewing beer and hand them one of my own, a lot of the time I'll give fair warning if the percent alcohol is above 7% Alcohol by Volume (ABV).  They usually say, "Oh", then wait a second, and finally ask, "How exactly do you know that?".  Most of the time it's someone saying "Really?  You're that much of a nerd that you calculate the percent alchohol of your beer?"  And to them I respond a firm "YES I DO", and I also calculate the percent Alcohol by Weight (ABW), which we'll talk about soon.

In the last post, I wrote about BU:GU ratios and had to briefly explain OG, but I didn't get into very much detail other than to inform you that it tells the homebrewer the concentration of sugar before the yeast is thrown in.  You might wonder how we get such a number as 1.048 for the Original Gravity, and the answer lies in a small homebrewing tool we call a hydrometer (see picture). 
It's basically like a floating thermometer except instead of measuring temperature, it measures the density of a liquid.  To use a hydrometer, you toss it in the liquid and the hydrometer will float to a certain numerical value on the skinny part of it that is flush with the surface of the liquid.  When a well calibrated hydrometer is placed in deionized water at 59 degrees F, it reads 1.000, and this makes sense because the density of water is roughly 1 kilogram per Liter (kg/L) or 1 gram per milliliter (g/mL), they mean the same thing.  When the hydrometer is placed in a solution that contains water mixed with a certain amount of sugar, like the sugars brewers extract from the grains, it will always read higher than 1.000 g/mL because sugar makes the solution denser.  So the OG on the hydrometer for a beer could read a number of ranges from 1.030 (not much sugar) to 1.120 (a hell of a lot of sugar).

You can check the concentration of sugar at any time you wish during the brewing/fermenting process and with the exception of two readings we typically refer to these readings as Specific Gravity or SG readings.  The two exceptions, which are essential to calculating the percent alcohol in your beer are the OG (Original Gravity) and the FG (Final Gravity) readings.  As explained earlier, the OG is the sugar concentration before the yeast is added, and as you can guess, the FG is the sugar concentration after the yeast is done converting the sugar into alcohol.  OG is measured when the wort is cooled and ready for the yeast and the FG is measured just before you bottle the beer.  The time between the two measurements depends on the type of beer, the higher the OG, the longer it takes to reach the FG.  Since you now know those two values I could just give you the formula for calculating %ABV, but where's the fun in that... to the chemistry!

Simplistically, here's what happens to sugar when yeast is added:


6H12O6 (one glucose sugar molecule) -------> 2 CO2 (gas) + 2 CH3CH2OH (ethanol, *this gets you drunk*)

There's much much more going on when yeast is added, but understand that roughly for every 1 glucose sugar molecule, it yields 2 carbon dioxide molecules and 2 ethanol molecules.  Depending on the type of yeast, most of the time not all the sugar is converted to ethanol and CO2, which is why some beers can taste sweeter than others.  Let's assume that we just got done fermenting a pale ale and it's ready for bottling, we take a hydrometer reading and record a FG=1.010, and the OG recorded weeks earlier was 1.055.  This may not be the most accurate way to calculate percent alcohol, but let's assume that all of the CO2 gas produced left out the airlock and all the ethanol produced remained in the beer.  By subtracting the FG from the OG, it tells us the concentration of CO2 that left.

In our example: 1.055 - 1.010 = 0.045 g/mL CO2


Since we know the balanced equation for converting sugar to alcohol and gas, we can use stoichiometry (bet you never thought you'd see this again) to determine the concentration of ethanol from the concentration of CO2 that left the beer.  Looking at a periodic table, we can obtain the molecular weights for ethanol (46.069 g/mol) and CO2 (44.009 g/mol), and starting with the concentration of CO2:


Alright, now that we know how much ethanol is in 1 milliliter of our beer and we also know the total weight of everything in 1 milliliter of our beer (from FG=1.010), we can take a ratio of these two values and what you end up with is a percentage of ethanol by weight in the final beer, which is referred to as percent Alcohol by Weight (%ABW):


But the fun doesn't stop there.  If you're from the U.S. like I am you'll notice most breweries report their alcohol percentages as Alcohol by Volume (%ABV).  The difference between ABW and ABV values has to do with ethanol being less dense than water, and because of this the ethanol occupies more volume.  The ABW is basing its value on just the weight of ethanol in say a 12oz bottle of beer, not the space it takes up in the 12oz bottle.  Since the final beer is usually made up of >90% water and some unfermented sugar, that percent of the beer has a density close to water's, which is 1.000 g/mL, telling us that roughly every gram occupies 1 millilers of volume.  Since the other percent has a the density of ethanol we must divide by the density of ethanol to see how much volume it occupies, so every 1 gram of ethanol would actually occupy 1.27 mL of volume.  Here's how percent Alcohol by Volume is calculated:


 OR


So our final beer is 5.9% ABV.  If you think about this logically, it falls apart when you get into high percent alcohol beers simply because if you had a 100% ethanol beverage it would be 100% ABW and 127% ABV, which isn't possible.  However, since most beers are within the 2-10% ABW range this method for ABV works quite well.

This can come in handy if you're ever in Europe where they express there percent alcohol by weight, and as an American you might be so used to judging your alcohol intake based on the %ABV that you might make the grave mistake of assuming they're close in value, or worse, the same.  So if you walk into a pub and order a pint that is 5.0% ABW you'll be quick to realize that your beer is actually 6.3% ABV.  If you'd like a quick and dirty way to calculate in your head (because god forbid that you bust out a calculator in a pub), I take a quarter of the %ABW value and add it back to the %ABW:

5.0/4 = 1.25 ---> 5.0 + 1.25 = 6.25% ABV  (I know... sig figs are wrong)

Not exact, but close enough for a quick answer.  Enjoy!